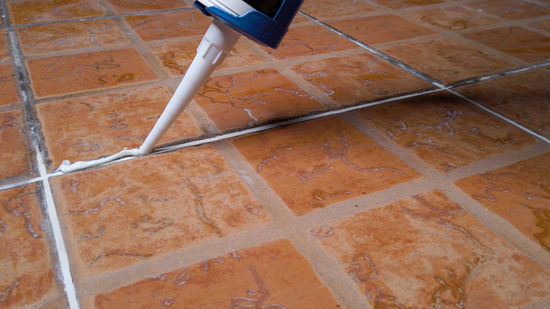
Tired-looking grout can make even the cleanest floors appear dull and neglected. While local floor cleaning services may offer professional solutions, resealing grout is a satisfying DIY project that can dramatically improve your floor’s appearance with minimal expense. This guide breaks down the process into manageable steps, helping you restore the fresh look of your tile surfaces while creating a protective barrier against future stains and moisture damage.
Gather Your Supplies
To begin resealing grout for revitalizing floors, gather your necessary supplies such as a grout cleaner, grout sealer, scrub brush, gloves, and clean cloths. The grout cleaner is crucial as it will help eliminate dirt, grime, or old sealer from the grout lines. Choose a high-quality grout sealer to ensure long-lasting protection for your floors. A scrub brush with durable bristles will assist in effectively cleaning the grout lines, reaching into the crevices to remove any buildup. Wear gloves to protect your hands from the cleaning chemicals and to provide a better grip on the tools. Finally, have clean cloths to wipe away excess cleaner and sealer for a pristine finish.
Prepare the Grout Surface
Prepare the grout surface by thoroughly cleaning it with the grout cleaner and scrub brush to remove dirt, grime, or old sealer. Start by applying the grout cleaner according to the manufacturer’s guidelines. Let it sit for a few minutes to penetrate and loosen any buildup. Then, scrub the grout lines vigorously using a scrub brush or a grout brush. Pay close attention to any stained or discolored areas. You may need to scrub harder or use a specialized grout cleaner for stubborn stains. After scrubbing, rinse the grout with clean water to remove residual cleaner. Allow the grout to dry completely before proceeding to the next resealing step. This ensures a clean and smooth surface for best resealing results.
Apply the Grout Sealer
Begin the sealing process by selecting a high-quality grout sealer designed for your specific type of grout and tile. Confirm the area is clean and dry before application. Using a small brush or applicator, start at a corner and work across the grout lines. Apply the sealer evenly, making sure to cover all the grout joints. Be cautious not to let the sealer puddle on the surface, which may lead to discoloration. Allow the sealer to penetrate for the recommended time, usually around 5-15 minutes, depending on the product. Once the sealer has been set, proceed to the next step: wipe off any excess sealer for a professional finish.
Wipe Off Excess Sealer
Remove any extra sealer by gently wiping the surface with a clean, dry cloth in a circular motion. This step ensures a clean and polished finish on your grout lines. Here are four essential tips to effectively wipe off extra sealer:
– Use a lint-free cloth: Opt for a lint-free cloth without lint to avoid leaving behind any fibers on the freshly sealed grout.
– Apply gentle pressure: Press lightly as you wipe to avoid removing the sealer from the grout lines.
– Check for any streaks: After wiping off the extra sealer, inspect the surface for any streaks or uneven areas.
– Repeat if necessary: If extra sealer spots are still visible, repeat the wiping process until the surface is smooth and evenly sealed.
Let the Sealer Cure
Allow the sealer to set undisturbed for the specified time indicated on the product label to ensure maximum protection and durability for your grout lines. During this setting period, refrain from walking on the treated area or allowing any liquid to come into contact with the newly sealed grout. The setting process is essential for the sealer to penetrate the grout fully and create a strong bond that will resist moisture and stains effectively. Keep the area well-ventilated to aid in the setting process. Make sure that the temperature and humidity levels are within the recommended range as specified by the product instructions. Allowing the sealer to set properly will guarantee long-lasting protection and a revitalized look for your floors.
Related Topics:
– Do Dry Cleaners Clean Rugs: What to Expect From the Service
– How to Clean a Persian Rug: Tips for Restoring Its Beauty